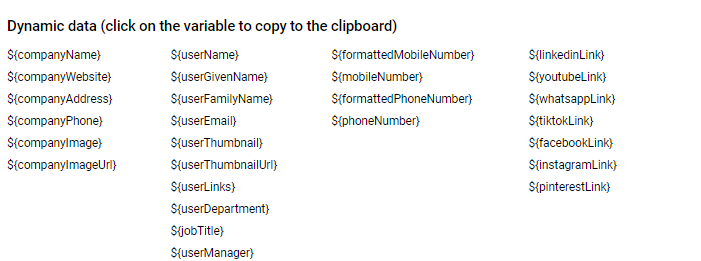
Adding dynamic variables
By adding dynamic variables to the template, we personalize the e-mail signature for each employee. With them, we have a guarantee that each employee will receive a signature with their own data.
Dynamic variables, allow you to personalize each template. We put them in HTML mode (editor mode change button </>) to maintain proper formatting.
You can use the search engine (ctrl+F), in order to find the selected piece of text in the code to change to a variable.
By clicking on a variable in the list, you automatically copy it to the clipboard to then easily paste it into your HTML code.
The ${userLinks} variable in the email signature template
The ${userLinks} variable allows administrators to add a field to the email signature template where each employee can independently enter their own link along with a description. The variable can be found in the list of variables under the template editor in the second column from the left.
With this feature in My Account, employees can personalize their footer by adding links to their projects, social media profiles or other resources relevant to them. The text describing the link can be formatted in HTML, allowing you to add bold, underline or color.

Variables now have a new “Variables” menu: they are grouped into categories, have a search engine, support name copying, and drag and drop (you drag the variable directly to the signature).
When the administrator sets default values, they will be immediately visible in the user template. Users can edit or delete default values themselves.
To save changes, use the “Save” button, or if at least one person already has the signature installed, “Save & Reinstall” allows you to automatically apply the change to the signatures of employees who previously had that signature installed. There is also a “Save & Reinstall” button button – with one click, you can save your changes and reinstall the signatures assigned to users without leaving the editing mode.
Note: We can define the user's first and last name separately. Instead of using the full name as a single variable ${userName} - there are two additional variables to choose from: ${userGivenName}, ${userFamilyName} representing the employee's name as entered in Google Workspace.
Variables such as First and Last Name, email address - come from Google Workspace and it is not possible to edit them at the gSignature application level. You can also use the ${userManager} variable to display the manager's email address in the signature. The data on the manager's email comes from Google Workspace updated by default in the GW settings.
Customize the display of your email address
With the variable ${labelUserEmail}, you can not only set a prefix in front of the email address, but also customize its appearance in many ways.
- Formatting: Change the color, font, or style of the text around the email address to make it stand out in the signature.
- Icons: Add any icon before or after the address to make it more visual.
- Conditional display: You can configure the email address to be displayed only to certain user groups (e.g. managers, sales staff).
How do I use this function?
- Go to “Settings - Advanced”.
- In the “Dynamic variables” section, find the ${labelUserEmail} variable.
- Set a prefix or leave it empty to use the default display.
- Go to the template editor.
- Insert the ${labelUserEmail} variable where you want to display the email address.
- Customize the design and add an icon if you want.
Didn't find a solution or answer to your question?
See here for more help or send us a message. Write which topic you are interested in or what issue you need help with.