First steps
A test account is required to use the application. Please note that registration must be done by a person who has Google Workspace administrator privileges (necessary to connect the application from the admin.google.com administration console).
Direct link to registration: https://gsignature.com/sign-up
After logging in for the first time, use the “Start” tab (onboarding with a progress bar), which guides you step by step through: configuring your first template, adding employees (Google Workspace or Microsoft 365/Exchange Online or CSV import), and installing your first signature.
Additionally: gSignature can also be distributed and installed via Google Workspace Marketplace (which simplifies implementation and authorization on the administrator's side).
Log in to gSignature: https://app.gsignature.com/login

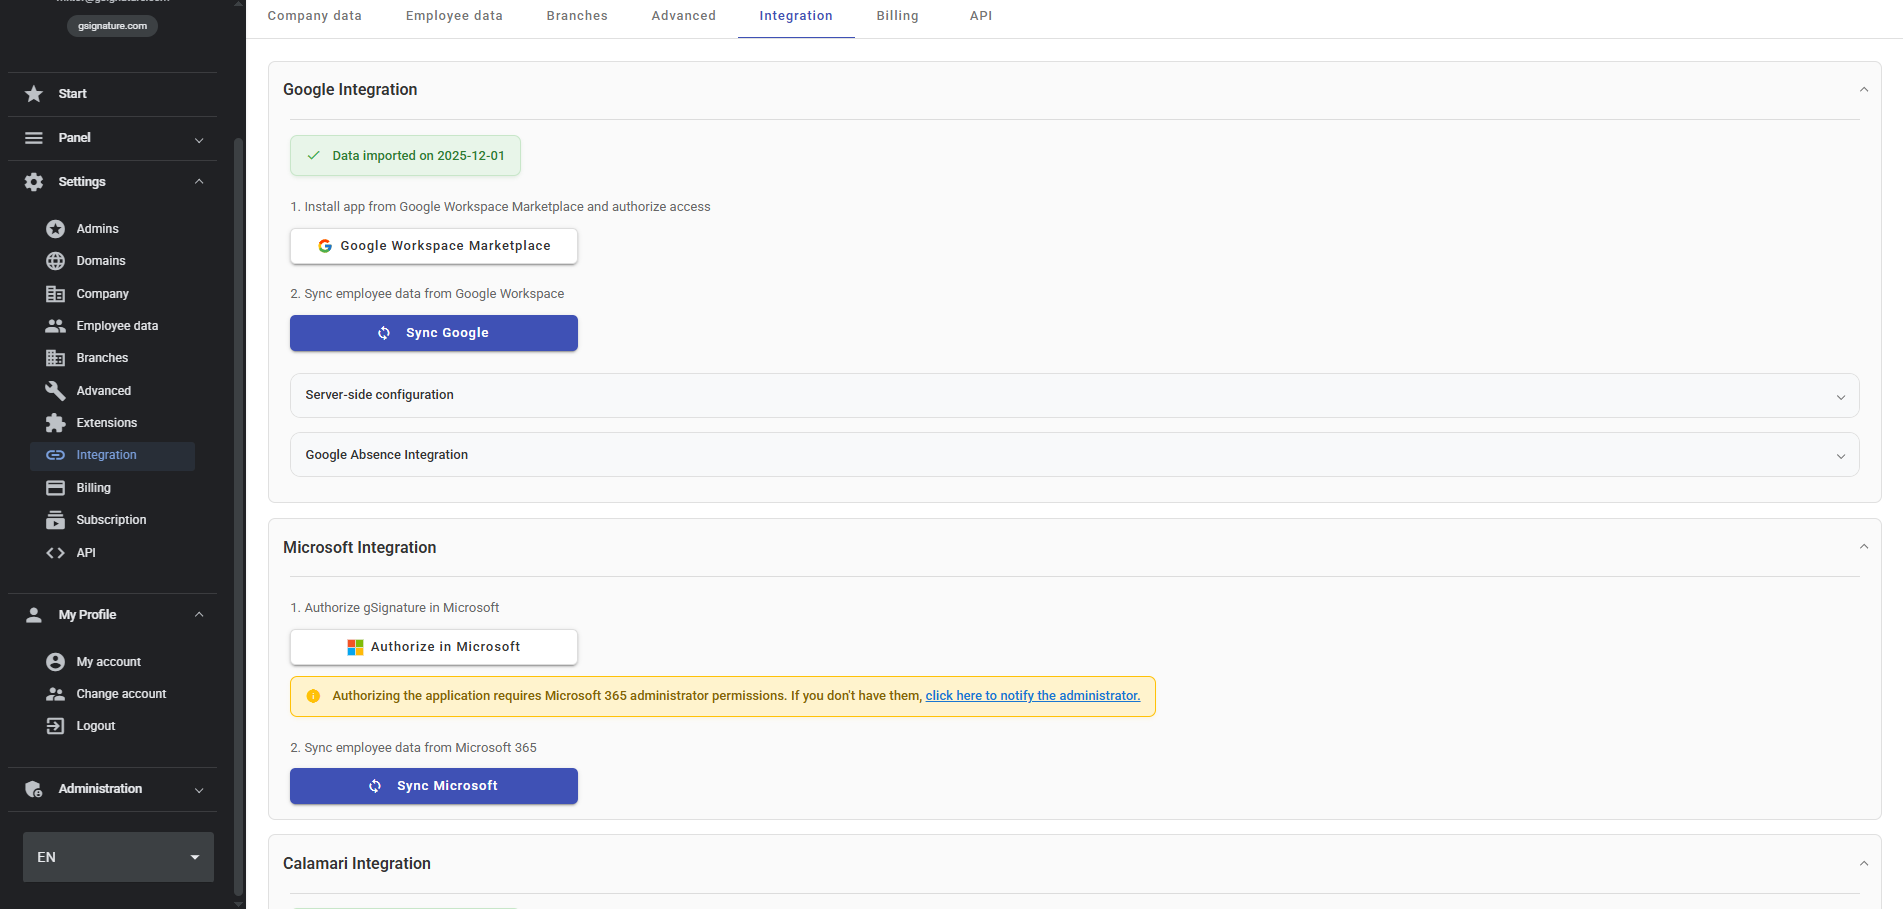
Integrate the app with Google Workspace, per instructions in the app: https://app.gsignature.com/settings/integration
After synchronizing the app with Google Workspace - go to the "Employees" tab in the gSignature app. Direct link -> https://app.gsignature.com/employees
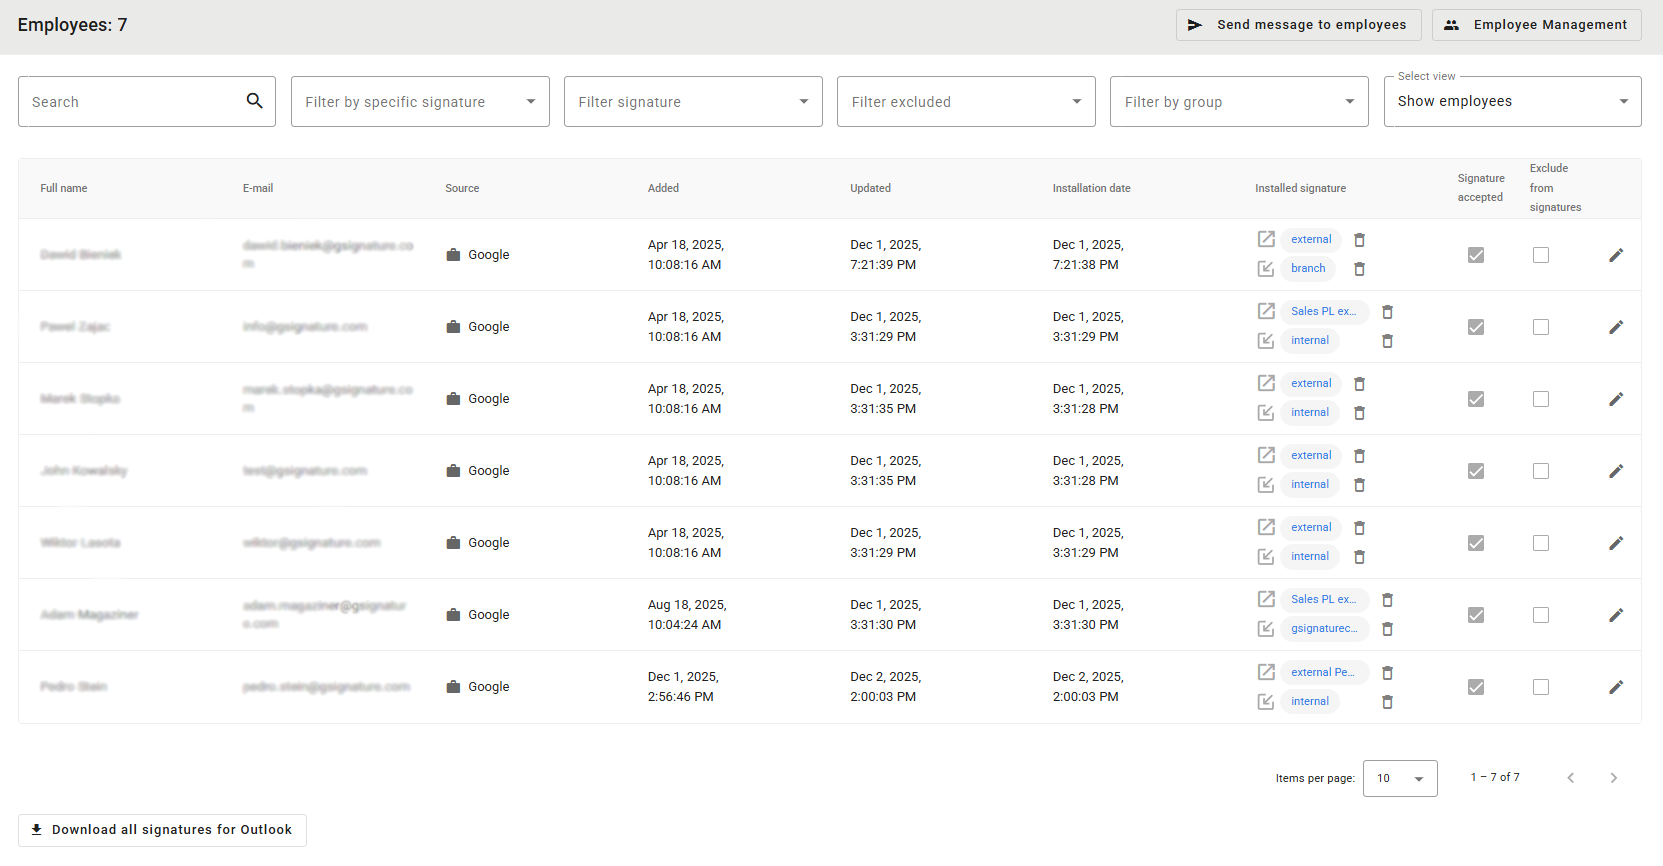
Click “Sync with Google” once to download employee email addresses along with data from Google Workspace. Each employee receives their own file with their data.
Alternatively (if you want to implement signatures in Gmail without classic integration): you can upload signatures to Gmail via CSV import + Chrome extension.
Important Gmail limitation: SVG format is not supported in Gmail signatures. If you use SVG in your templates/logos/icons, replace the files with PNG/JPG/GIF so that the graphics do not disappear for recipients.
Integrate via the Google Workspace Marketplace app:
https://app.gsignature.com/settings/integration
Link to Google Workspace Marketplace: https://workspace.google.com/marketplace/app/gsignature/808552810822
You must be Google Workspace administrator to install it.
Synchronization with Google Workspace, Outlook, Microsoft 365, Exchange Online
First, make sure that the integration with Google Workspace, Outlook, Microsoft 365, or Exchange Online has been set up correctly, following the instructions in the app: https://app.gsignature.com/settings/integration
Then, review the settings below.
The “Advanced” and ‘Integration’ settings sections allow you to synchronize user data and email signatures.
The latest “Start” onboarding guides you through adding employees from both Google Workspace and Microsoft 365/Exchange Online (and optional CSV import).
Overwriting data via Google synchronization:
- Synchronization can be started manually using the “Google Integration” tab
- Selecting this option will replace the data in gSignature with data from Google Workspace.
In Google Workspace Integration, you can disable profile picture overwriting during synchronization (when using custom avatars in gSignature).
Update signature when Google data changes:
Selecting the “Overwrite data via Google synchronization” option will automatically update the signature data in gSignature after each change to user data in Google Workspace. Additionally: in Settings → Advanced → User settings, you can centrally control additional permissions and elements on the user side, such as the ability to add your own links to the signature, selected consents/settings regarding the signature content, and the ability to upload and use a handwritten signature.
- These changes will then be automatically re-implemented in the signatures.
Adding new licenses:
- Even if the data overwriting and automatic update options are disabled, new licenses added to Google Workspace will still be included in the signatures.
- By default, only the name and email address will be added.
Synchronizing profile photos and employee data, and automatic signature synchronization for Outlook Desktop
To manually synchronize profile photos and user data from Google Workspace, click the “Synchronize with Google” button on the “Employees” tab. If an administrator or employee uploads a custom avatar, it may remain active until manual synchronization (“Sync with Google”) or the advanced setting “Overwrite data with Google synchronization” is enabled (in which case the profile photo from Google Workspace will return).
To have profile photos and employee data automatically updated in signatures after synchronization, enable the “Update signature when Google data changes” option in the advanced settings.
Additionally, for Outlook Desktop users, we offer automatic signature synchronization. With PowerShell integration, IT administrators can deploy a script that:
- Automatically synchronizes email signatures on users' computers, eliminating the need for manual configuration.
- Supports a synchronization schedule, ensuring that signatures are always up to date.
- Runs in the background without disrupting users' daily work.
Default signature:
- The default signature allows you to automatically assign the selected signature template to all new licenses added to Google Workspace.
- Setting a default signature before syncing with Google Workspace will assign it to all users synced with Google Workspace.
- It is recommended to set a default signature after the first sync to avoid mass installation of signatures without control.
- Additionally, before the first installation of signatures, it is recommended to disable the address in the signature settings.
In the Employees tab, there is an “Install All” button that triggers a mass installation/update of signatures for all users (including aliases), with a visible progress bar and the ability to control when the last installation took place.
Optionally (for discipline and compliance): in Settings → Advanced, you can enable “Daily signature reinstallation” and set the time at which the system will automatically restore signatures to a state consistent with the template.
Tutorial:
Didn't find a solution or answer to your question?
See here for more help or send us a message. Write which topic you are interested in or what issue you need help with.